Are you a beer enthusiast who dreams of having a perfectly chilled draft beer at home, just like at your favorite pub? Well, you're in luck! The trend of installing kegerators under the counter is gaining popularity among beer connoisseurs. Not only does it save space, but it also adds a touch of sophistication to your home bar. In this comprehensive guide, we will walk you through the process of installing a kegerator under the counter. We will also review three top-rated products in the market: the Edgestar Kegerator, the Kegco Kegerator, and the Marvel Kegerator
Part 1: Understanding the Kegerator: Under Counter Installation Essentials
Before we jump into the installation process, let's take a moment to understand what a kegerator is and why installing it under the counter is a popular choice. A kegerator is essentially a refrigerator that is specifically designed to store and dispense kegs of beer. It keeps the beer at the perfect temperature and maintains the carbonation, ensuring that you enjoy a fresh and crisp pint every time.
Now, why install it under the counter? Well, installing a kegerator under the counter not only saves space but also adds a sleek and professional look to your home bar. It eliminates the need for a standalone kegerator taking up valuable floor space. With an under counter installation, you can conveniently access your favorite brews without compromising on aesthetics.
Part 2: Tools and Preparations for Installing Kegerator Under Counter
Before we start the installation process, let's gather the necessary tools and equipment. You will need:
- Tape measure
- Screwdriver
- Wrench
- Drill
- Level
- Rubber mallet
- Beer and gas lines (included with the kegerator)
- CO2 tank (included with the kegerator)
- A friend to assist you (optional but recommended)
Once you have all the tools and equipment ready, it's time to prepare for the installation. Make sure you have enough space under the counter for the kegerator. Measure the dimensions of the kegerator and ensure that there is adequate clearance for ventilation. Also, check if there is an electrical outlet nearby for powering the kegerator.
Prepping for Your Kegerator Under Counter Installation
Before you begin the installation, it's important to prepare the area where you will be installing the kegerator. Clear out the space under the counter and clean it thoroughly. Remove any obstacles that might hinder the installation process. It's also a good idea to make sure the floor is level to ensure stability.
Now that you have prepped the area, let's move on to the product reviews and installation process of the top three kegerators in the market.
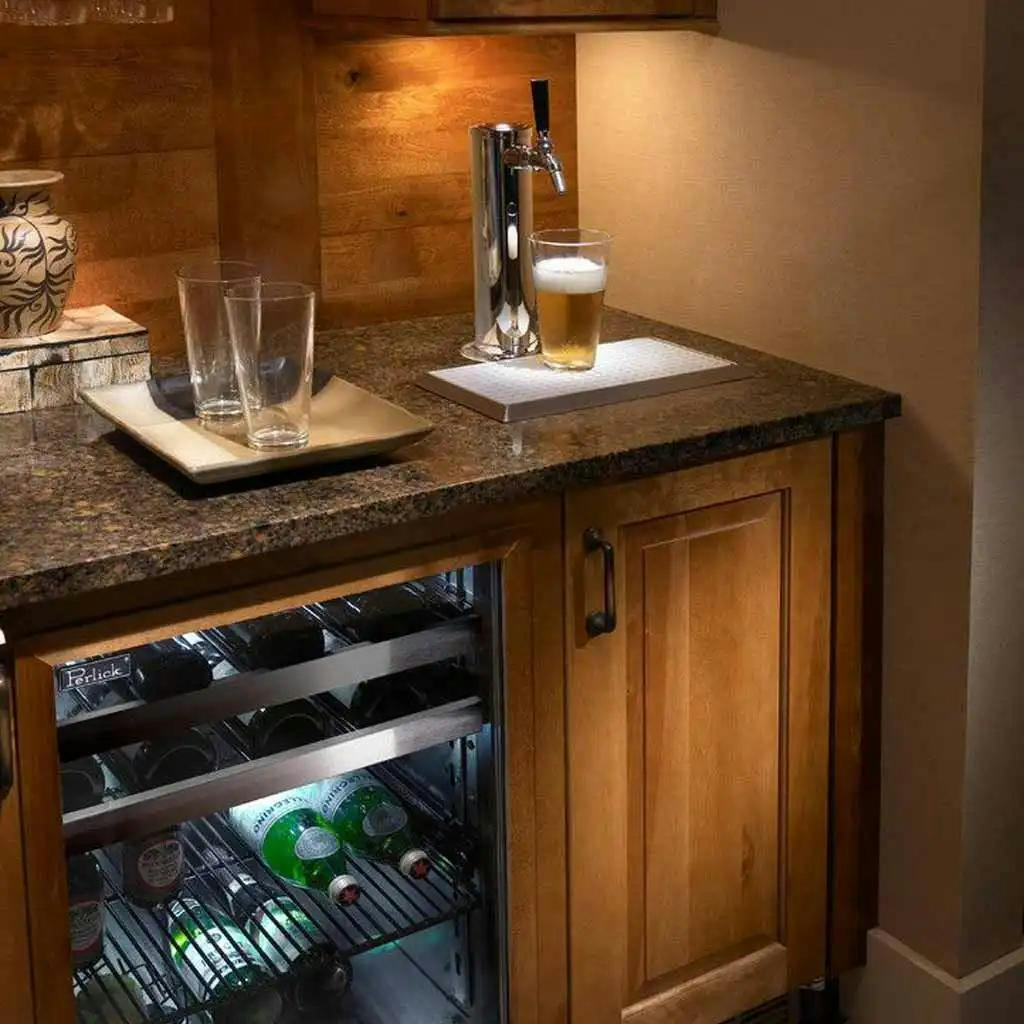
Part 3: Edgestar KC2000SS Kegerator to Install Under Counter
The Edgestar KC2000SS Kegerator is a highly-rated under counter kegerator that offers great value for money. With its sleek stainless-steel design, it adds a touch of elegance to any home bar. The installation process is relatively straightforward. The kegerator comes with all the necessary components, including beer and gas lines, ensuring a hassle-free installation.
Pros:
- Easy installation process with clear instructions
- Durable stainless-steel construction
- Adjustable thermostat for precise temperature control
- Spacious interior can accommodate full-size kegs
Cons:
- Some users reported issues with temperature consistency
- The CO2 tank can be difficult to secure properly
The Heart of Installation: Setting up Your Kegerator Under Counter
Now that we have reviewed the first product, let's move on to the installation process. Here are the practical steps to set up your kegerator under the counter:
Step 1: Position the kegerator in the designated area under the counter. Make sure it is level using a level tool.
Step 2: Attach the beer and gas lines to their respective outlets on the kegerator. Use a wrench to tighten the connections securely.
Step 3: Connect the other ends of the beer and gas lines to the corresponding outlets on the keg. Again, use a wrench to ensure a tight connection.
Step 4: Place the CO2 tank in a secure location. Connect one end of the CO2 line to the tank and the other end to the gas inlet on the kegerator.
Step 5: Turn on the CO2 tank and adjust the pressure according to the keg manufacturer's recommendations.
Step 6: Plug in the kegerator to the electrical outlet and set the desired temperature using the adjustable thermostat.
Step 7: Allow the kegerator to cool down for a few hours before tapping into your favorite brew.
Mastering the Art of Kegerator Under Counter Installation
While the installation process may seem straightforward, here are some tips and tricks to ensure a seamless installation:
Measure twice, install once: Double-check the dimensions of your kegerator and the space under the counter to avoid any surprises during the installation process
Take your time with the connections: Ensure that all the connections are tight and secure to prevent any leaks. A leaky kegerator can lead to flat beer and wasted CO2.
Test for leaks: After completing the installation, perform a leak test by pressurizing the system and spraying a mixture of soapy water on all the connections. If you see any bubbles, there is a leak that needs to be addressed.
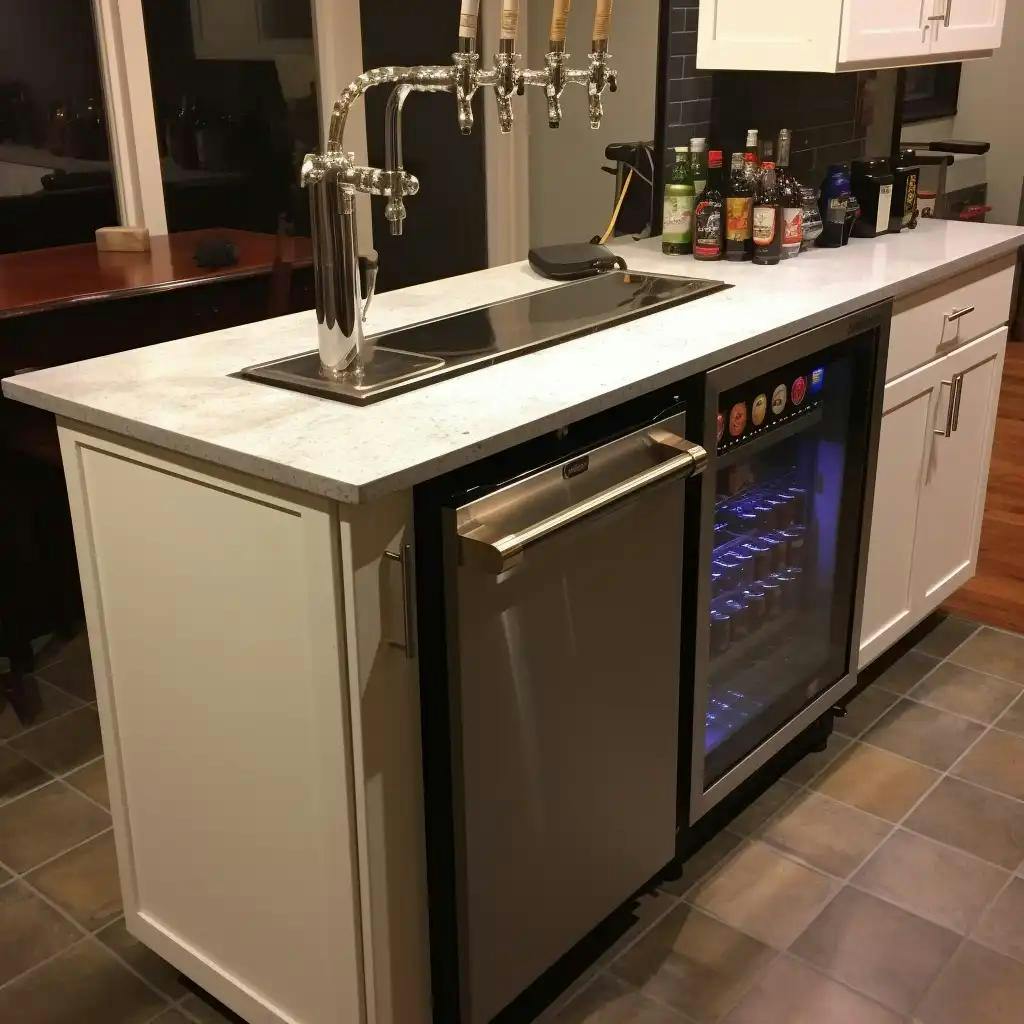
Part 4: Kegco K309SS-2 Kegerator to Install Under Counter
The Kegco K309SS-2 Kegerator is a high-quality under counter kegerator that is known for its durability and reliability. It features a spacious interior that can accommodate up to three kegs, making it a great choice for beer enthusiasts who like to have a variety of brews on tap. The installation process is relatively straightforward, thanks to the detailed instructions provided with the kegerator.
Pros:
- Spacious interior can accommodate multiple kegs
- Stainless steel construction for durability
- Dual faucet design allows for dispensing two different beers simultaneously
- Easy-to-follow installation instructions
Cons:
- Some users reported issues with temperature control
- The included CO2 tank may not be large enough for heavy use
Finessing Your Installation: Electricals and Final Setup
Now that we have reviewed the second product, let's move on to the final steps of the installation process. Here's what you need to do:
Step 1: Ensure that there is an electrical outlet nearby for powering the kegerator. If needed, hire a professional electrician to install an outlet in a convenient location.
Step 2: Plug in the kegerator to the electrical outlet and make sure it is securely connected.
Step 3: Adjust the temperature settings on the kegerator according to your preference. It is recommended to set the temperature between 36°F and 38°F for optimal beer storage and dispense.
Achieving Perfect Installation - Tweaking and Adjustments
To achieve a perfect installation, here are some additional tips to fine-tune and personalize your kegerator setup:
Optimize the beer line length: The length of the beer line affects the flow rate and the quality of the pour. Experiment with different line lengths to achieve the desired pour.
Insulate the beer lines: To minimize temperature fluctuations and maintain the freshness of the beer, consider insulating the beer lines with foam insulation.
Personalize the tap handles: Add a personal touch to your kegerator by replacing the standard tap handles with custom-designed handles that reflect your style and preference.
Part 5: Marvel ML24BNP2RP Kegerator to Install Under Counter
The Marvel ML24BNP2RP Kegerator is a premium under counter kegerator that offers exceptional performance and style. Its sleek and modern design, coupled with advanced temperature control features, makes it a top choice for beer enthusiasts who value aesthetics and functionality. The installation process is relatively straightforward, thanks to the detailed instructions provided with the kegerator.
Pros:
- Sleek and modern design
- Advanced temperature control features for precise temperature management
- Quiet operation
- Spacious interior can accommodate full-size kegs
Cons:
- Higher price point compared to other kegerators
- Some users reported issues with the durability of the door handle
After Installation: Care and Maintenance for Your Kegerator Under Counter
Congratulations on successfully installing your kegerator under the counter! Now, let's talk about the care and maintenance required to keep your kegerator running smoothly and your beer tasting great.
To ensure the longevity and optimal performance of your kegerator under the counter, follow these tips:
Regularly clean the beer lines and faucets to prevent the buildup of bacteria and yeast.
Clean the kegerator's interior at least once every few months to remove any residue or spills.
Check the CO2 tank pressure periodically and refill or replace it as needed.
Inspect the seals and gaskets for any signs of wear and tear and replace them if necessary.
Keep the kegerator's exterior clean by wiping it down with a damp cloth.
Conclusion
Installing a kegerator under the counter is a game-changer for beer enthusiasts. Not only does it save space, but it also adds a touch of sophistication to your home bar. In this comprehensive guide, we have discussed the essentials of installing a kegerator under the counter and reviewed three top-rated products: the Edgestar KC2000SS Kegerator, the Kegco K309SS-2 Kegerator, and the Marvel ML24BNP2RP Kegerator.
Remember, the installation process may require some time and effort, but the reward of having perfectly chilled draft beer at home is well worth it. So, grab your tools, follow the instructions, and get ready to tap into convenience!
FAQs
Can I install a kegerator under any type of counter?
Most kegerators are designed to be installed under standard countertops. However, it's important to check the dimensions of the kegerator and the available space under your counter to ensure a proper fit.
Do I need any special tools to install a kegerator under the counter?
While not necessarily "special" tools, you will need basic tools such as a tape measure, screwdriver, wrench, drill, and level. These tools will help you with the installation process.
How long does it take to install a kegerator under the counter?
The installation time can vary depending on your level of experience and the complexity of the kegerator model. On average, it may take a few hours to complete the installation.
Can I install a kegerator under a kitchen counter?
Yes, you can install a kegerator under a kitchen counter. However, it's important to consider the ventilation requirements and ensure that there is enough clearance for proper airflow.
Can I use a kegerator for beverages other than beer?
While kegerators are primarily designed for storing and dispensing beer, you can use them for other carbonated beverages such as soda or sparkling water. Just make sure to clean the lines thoroughly before switching between different types of beverages.

About Marianne Williamson
Marianne Williamson, a Texan, finds BBQ a mindful journey of connection. The grill isn't just about cooking—it's a way to relish the moment and create memories. With the sun's warmth and the sizzle, grilling becomes an exploration, from marinades to searing. Join her in celebrating life's flavors and joys around the grill.